
Hello everyone, I’m Eng. Emanuele Tonucci, I’m a computer science teacher and software developer.
I have been passionate about the world of astronomy for about 2 years.
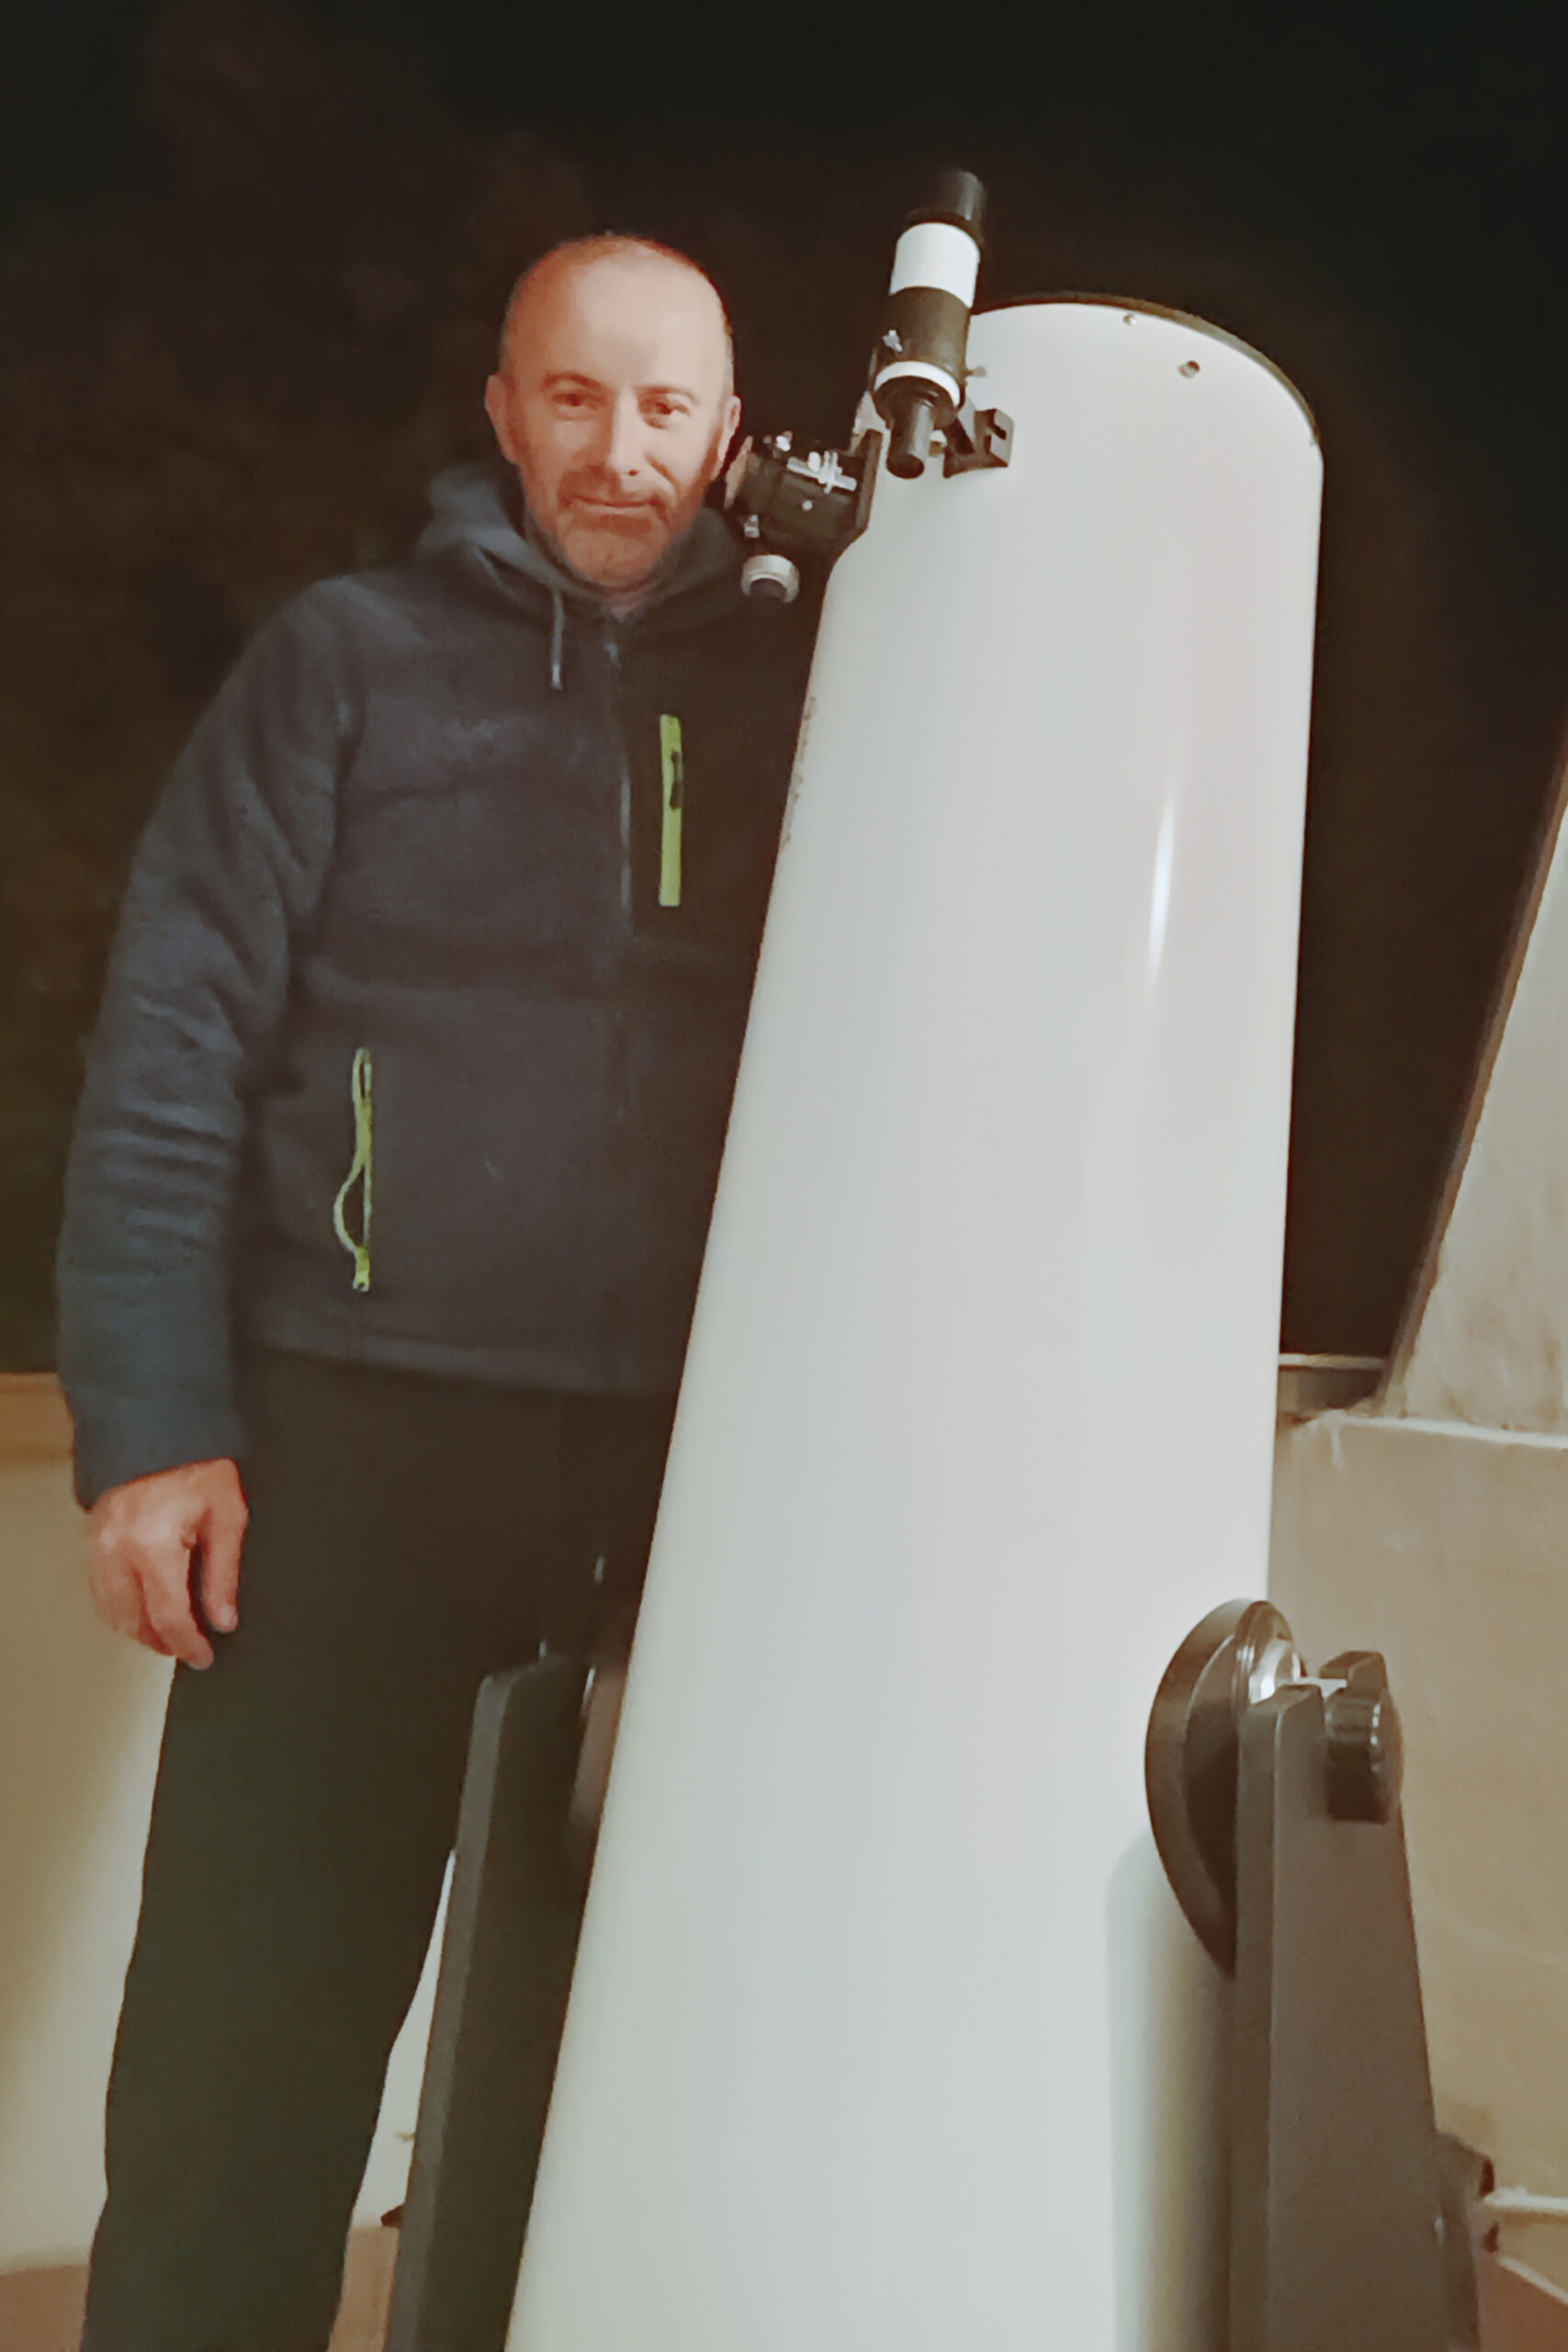
Here I’m photographed on the terrace of my house with my GSO 12″ Deluxe!
I immediately ran into the constant problem of collimation of the mirrors, so I decided to develop a software that would help me in order to speed up and make collimation more precise!
So I created a software that I called Collimator.NET.
Collimator.NET is a free software that allows you to collimate your telescope via a common webcam.
Currently the Collimator.NET software works on the Windows platform, but I’m trying to develop it for Android too, which is not a very simple operation, we’ll see if I can!
Below you can find the link to download the Collimator.NET installer:
The camera used for my tests is the Logitec C920.
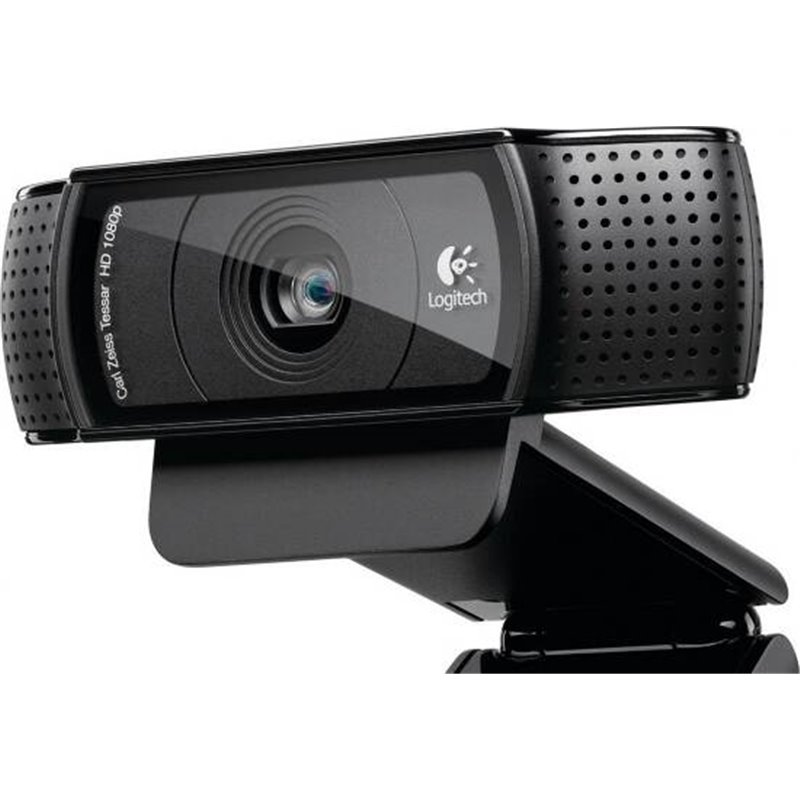
I chose this camera, first because it was already in my possession ;), then because it also has the focus function, very useful for my purpose.
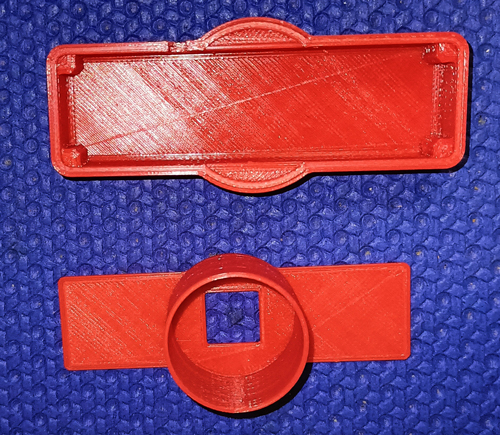
I also made a model for a 3D printer that can be used to connect the Logitec C920 webcam to the telescope, you can download it from this link:
https://drive.google.com/file/d/1AVIyrBPI2uBFwpOmZJ9PC6qgH-UdJPzg/view?usp=sharing
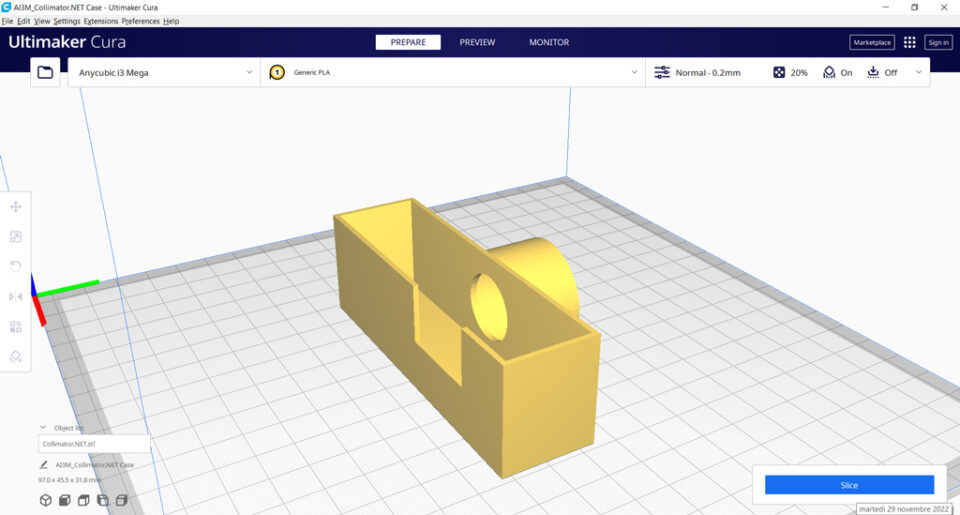
This is the result:
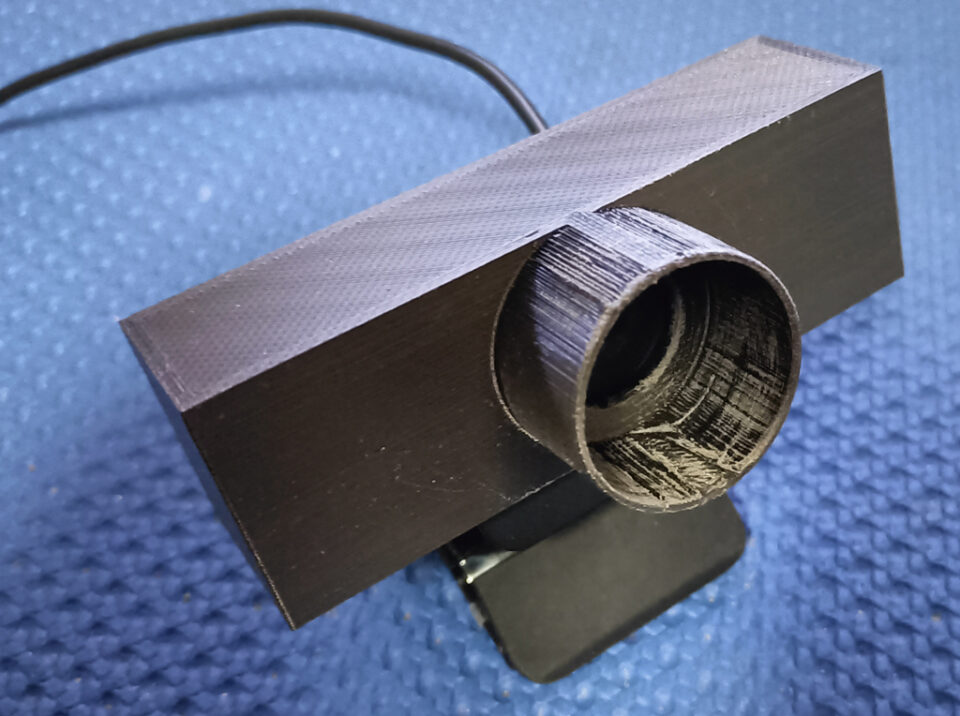
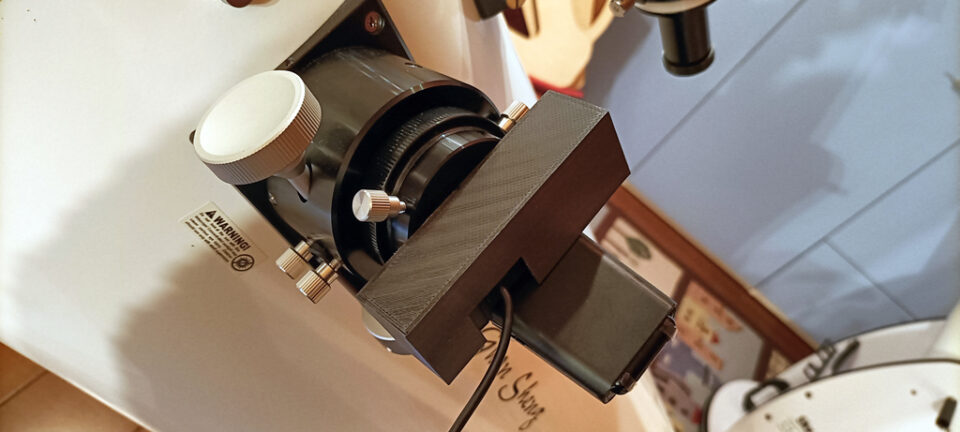
Or if you wanted to open the webcam and extract the internal electronics, you could download these files from Thingiverse. I didn’t use this model because I didn’t feel like opening my Logitec C920, so I redesigned the previous support.
The links are: https://www.thingiverse.com/thing:4560254 e https://www.thingiverse.com/thing:458023
Here is the result of the Thingiverse model:
Donation a coffee
Anyone who wants to make me a small donation will certainly be welcome 😉
Collimator.NET – Structure
The purpose of this software is to visually try to align the telescope’s primary and secondary mirrors.
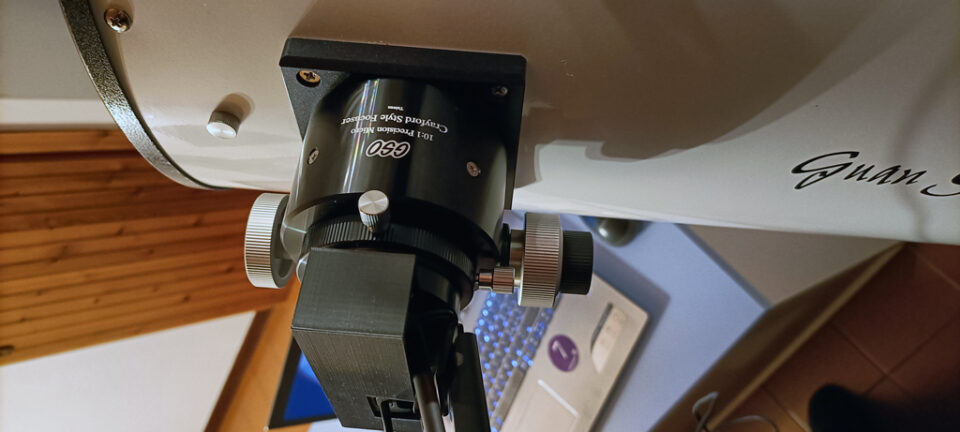
The camera used must be inserted in the focuser as shown in the following figures:
At this point, by running Collimator.NET the following screen will be displayed:
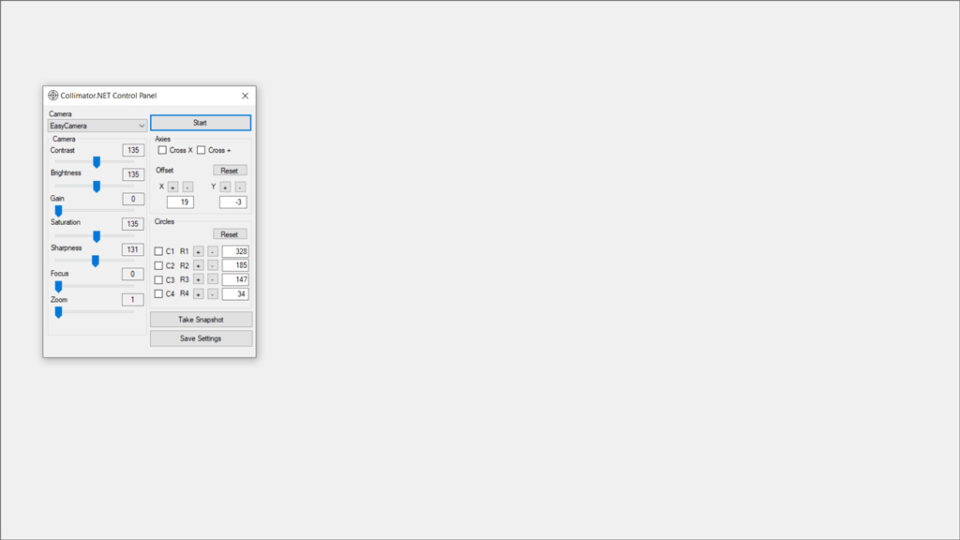
The Collimator.NET interface is very simple, there is a full-screen screen as background where the webcam footage will come and a control panel.
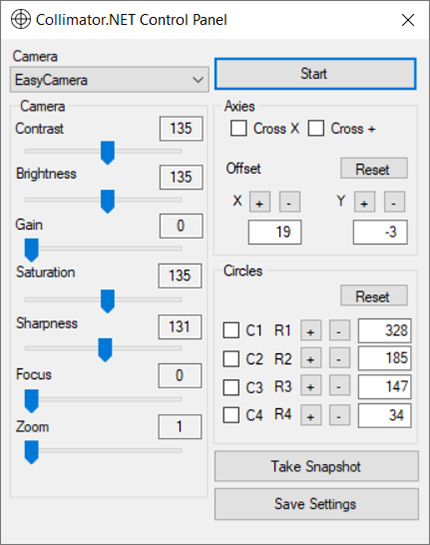
The control panel consists of a “Combo Box” where it is possible to select the webcam that will be used and on its right there is a Start button to start using the selected webcam.
On the left side of the panel there are the camera management controls, while on the right there are the controls necessary to display the X and + “crossroads”, the buttons to manage the offset of the center of the camera with respect to the focuser, the buttons to manage 3 modifiable beam circumferences necessary to best collimate the mirrors.
Immediately below there are 2 other buttons “Take Snapshot” necessary to acquire an image of the webcam screen including the circles and the “crossroads”, while the other button is useful for recording the current configuration of the control panel, in so that you can reopen the same settings for other collimations.
As mentioned in the upper part of the Collimator.NET control panel there is a “Combo Box” with the list of usable video sources, it will be necessary to select the webcam used, in my case HD Pro Logitec C920:

Collimator.NET – How it works
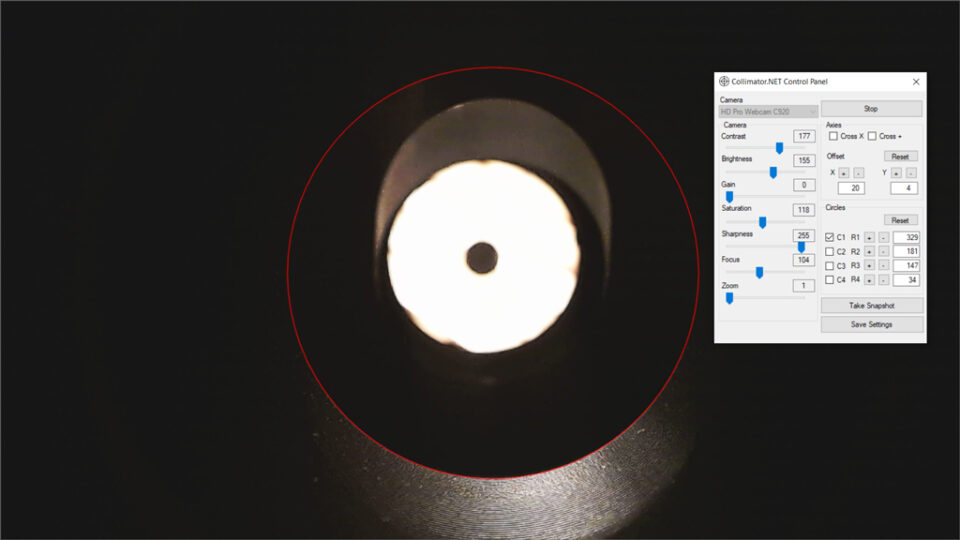
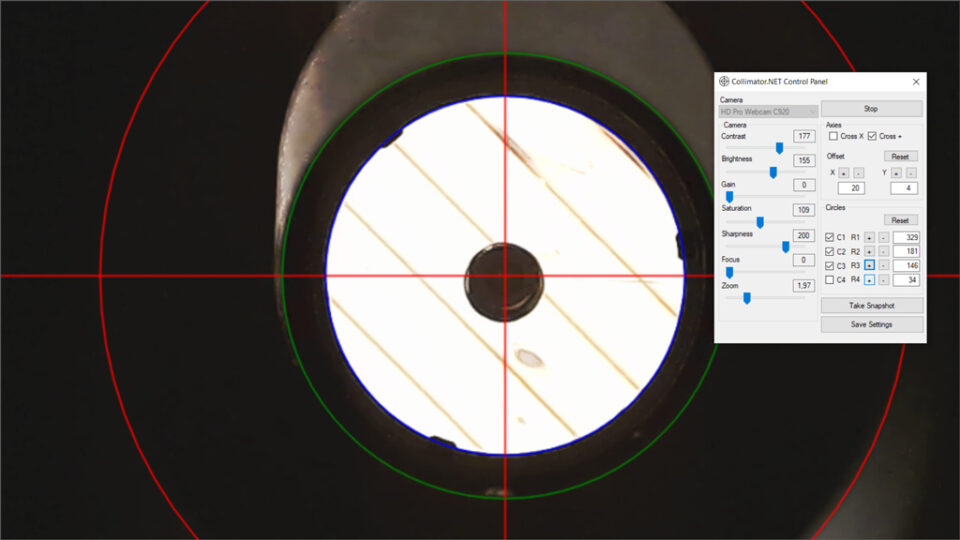
After inserting the webcam into the focuser and pressing the “Start” button, what you will see will be something like this:
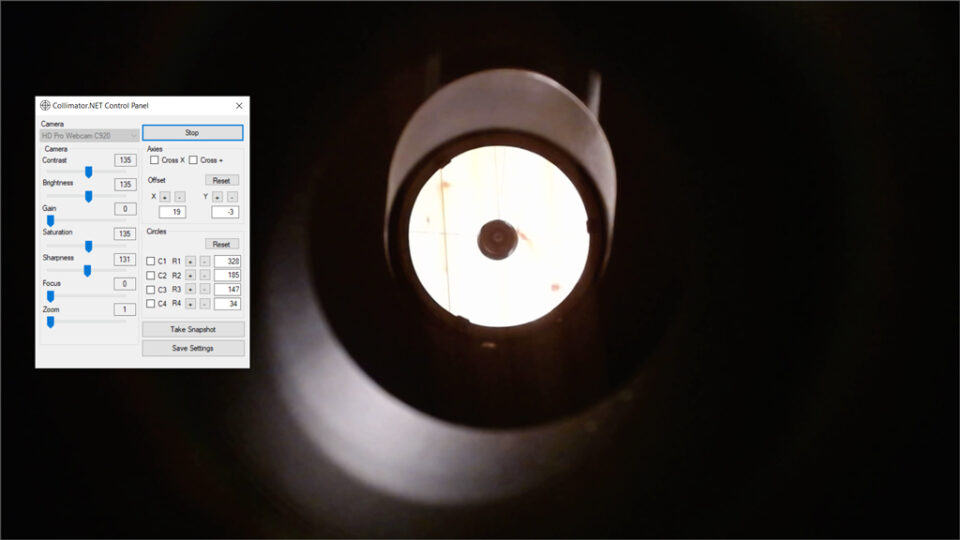
First of all try to move the focuser to get a sharper image, usually I bring it to the minimum travel.
Furthermore, working with the left controls it will be possible to correctly manage the contrast, brightness, saturation, sharpness and focus (if the webcam supports it).
It is necessary to choose suitable values to correctly see the edge of the focuser, the support of the secondary mirror, the edge of the “breech” of the primary mirror and the edge of the primary mirror itself as visible in the following image:
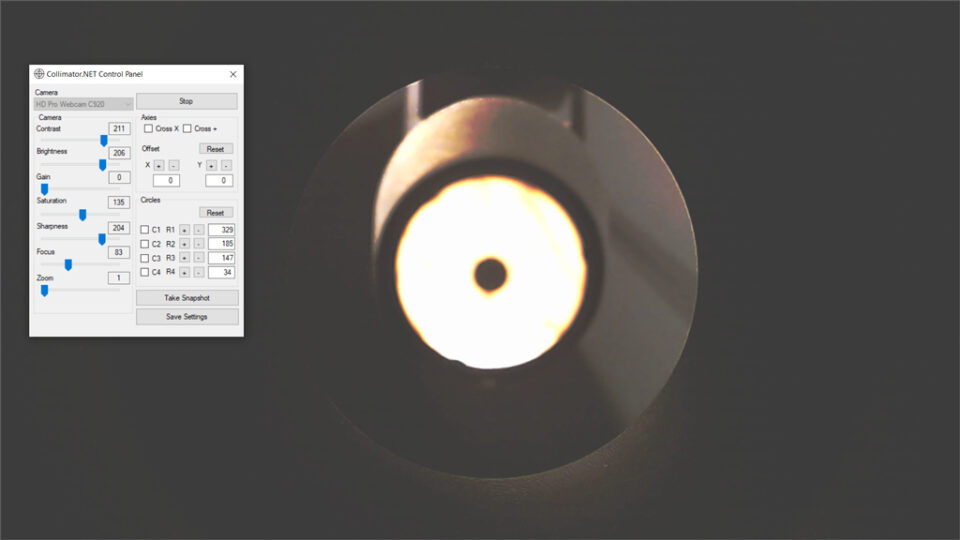
Accurate image on the edge of the focuser
If necessary, it is also possible to insert a white sheet of paper inside the tube behind the secondary mirror to increase the contrast of the mirror itself.
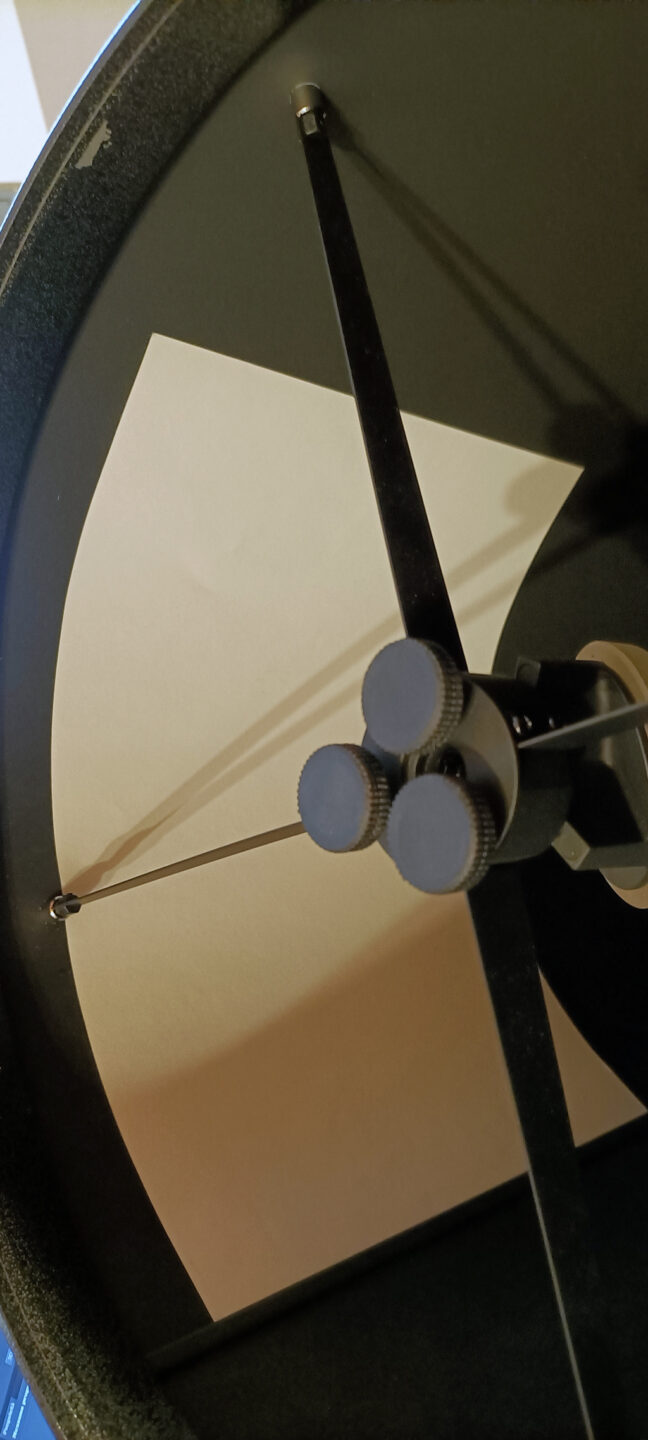
At this point it is necessary to point the telescope towards a lighted wall and start the alignment procedures.
The first thing to do is locate the edge of the focuser in the image and light up the “C1” circle. It is therefore necessary to align the circle “C1” using the X and Y offset buttons and enlarge or reduce the circle “C1” with the appropriate buttons, until touching the edge of the focuser as precisely as possible, it is also possible to use the zoom slider to achieve the most accurate overlap of the “C1” circle with the focuser edge.
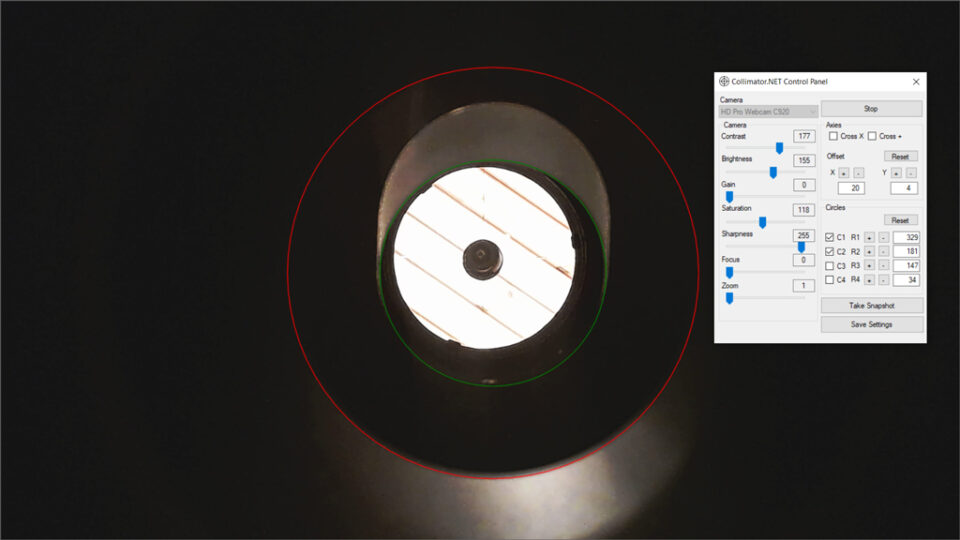
Once this is done it is necessary to turn on the second circle “C2” and proceed as before, but on the edge of the secondary mirror. The secondary mirror in a Newtonian telescope is elliptical, but from the focuser it should be seen as a disc as precise as possible. Through the central screw of the secondary mirror support it is possible to rotate, move the mirror support back and forth until the correct circular figure is reached.
Now you need to align the secondary mirror. Turn on circle “C3” looking for the correct radius of the circle that best “encloses” the figure of the primary mirror.
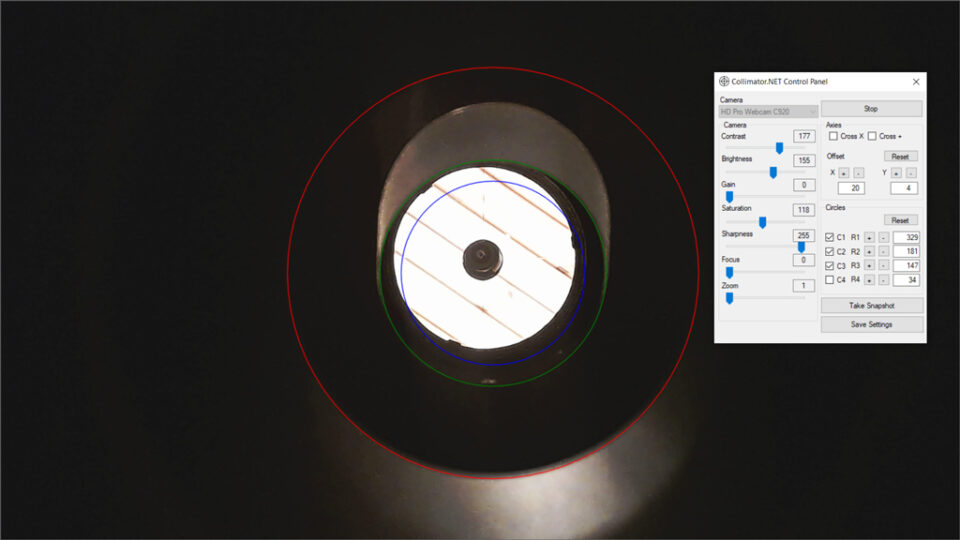
To do this, turn the 3 screws on the mirror support and align the image of the primary mirror as precisely as possible with the circumference of the circle “C3”.
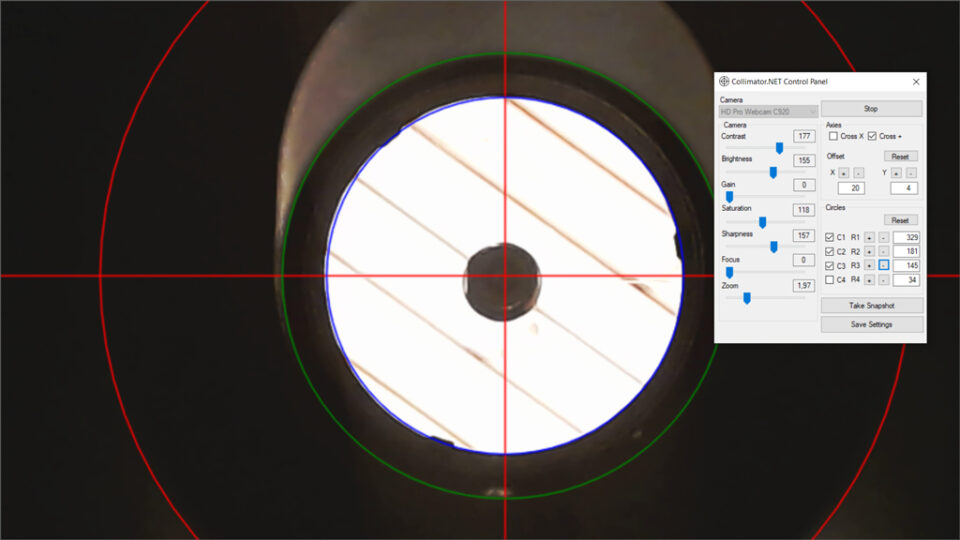
Once the best alignment of the “C3” circle has been achieved, it is necessary to adjust the primary mirror using the appropriate screws or better Bob’s Knobs on the rear breech of the telescope in order to center the camera sensor and the center spot of the primary mirror with the “red crosshair”.
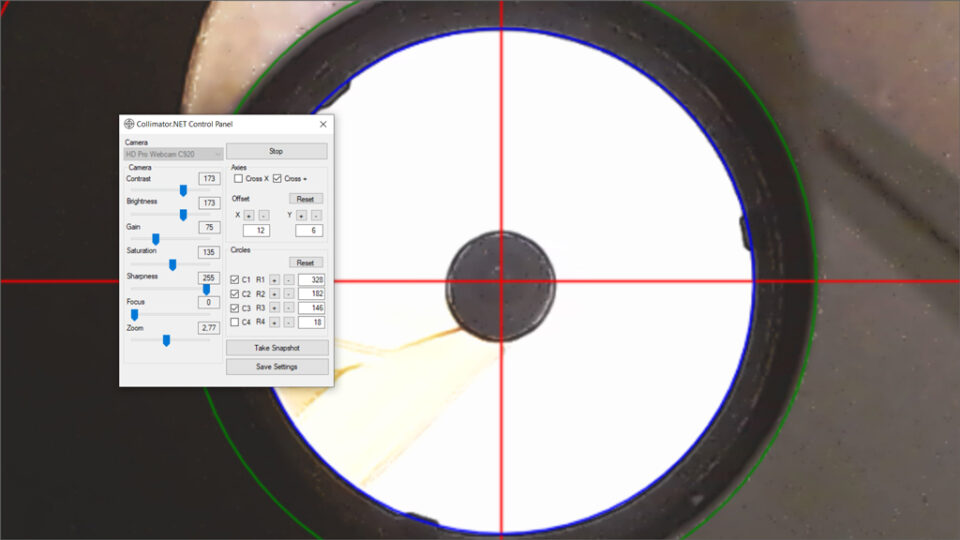
Is it possible to notice that the camera lens appears offset within the black part (focuser tube reflection). This is typically the case with faster Newtonian telescopes (generaly equal or less than F5) and is perfectly normal and probably mentioned in your telescope manual.
This is an example of an incorrect and correct collimation:
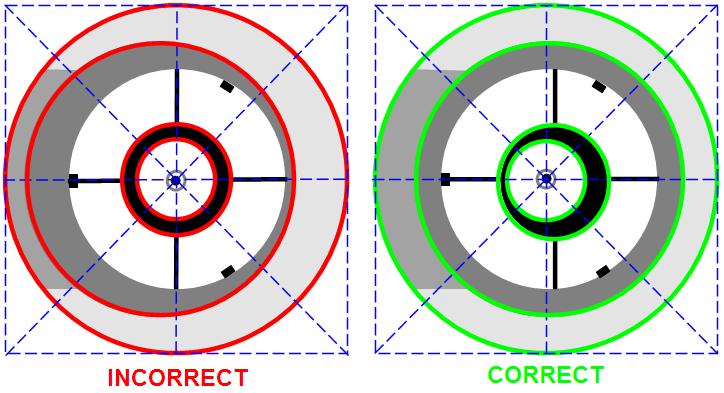
Achieved the alignment goal, the telescope mirrors will be collimated!
I hope this system will help all enthusiasts!
Good work, good observations and of course clear skies!
Prof. Ing. Emanuele Tonucci
Donation a coffee
Anyone who wants to make me a small donation will certainly be welcome 😉